Review - Revolution Imager
Posted: 6 June 2016
Updated: 6 July 2016
 Revolution Imager, model R2
$300
Orange County Telescope
Go to the latest update (07/06/16)
I saw an ad for the Revolution Imager in a recent Sky and Telescope magazine. I checked out the product web site and became really intrigued by the Revolution Imager (which I will call "RI" in this review). It looked like the RI would make a superb public outreach addition to my observatory as well as being very useful at star parties at our local IDA "International Dark Sky Park". After watching a video about it I knew I needed to check it out. I contacted the company and they sent me an evaluation unit of the newly shipping "R2" model.
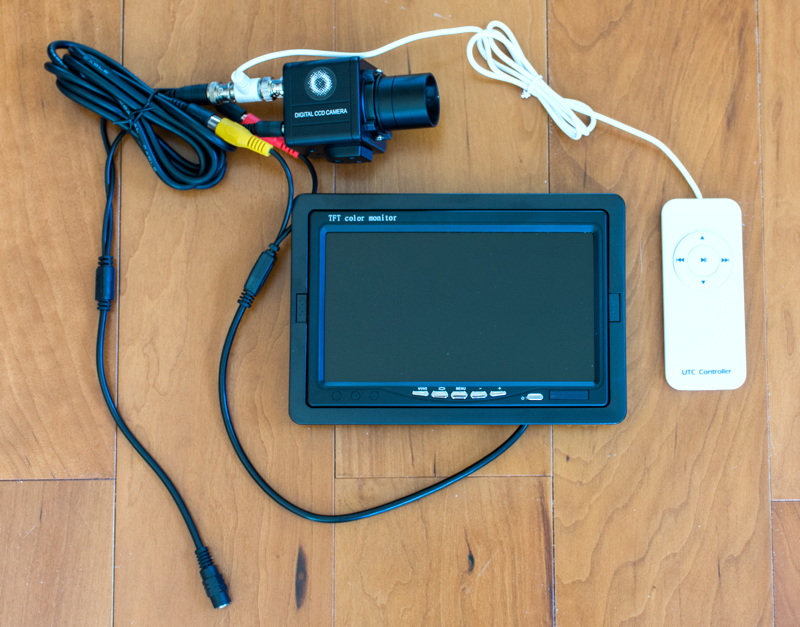
The Revolution Imager came mostly packaged in a nice soft-sided case containing the camera, 7" color monitor (with adjustable stand and wireless remote), small wired remote for the camera, 1.25" adapter, 1.25" 0.5X focal reducer, 1.25" UV/IR cut filter, cables, battery pack with AC charger, two printed sheets of instructions and a small manual for the monitor, and some decals. A USB Video Capture Adapter (optional but included free with current orders for a limited time) was also provided.
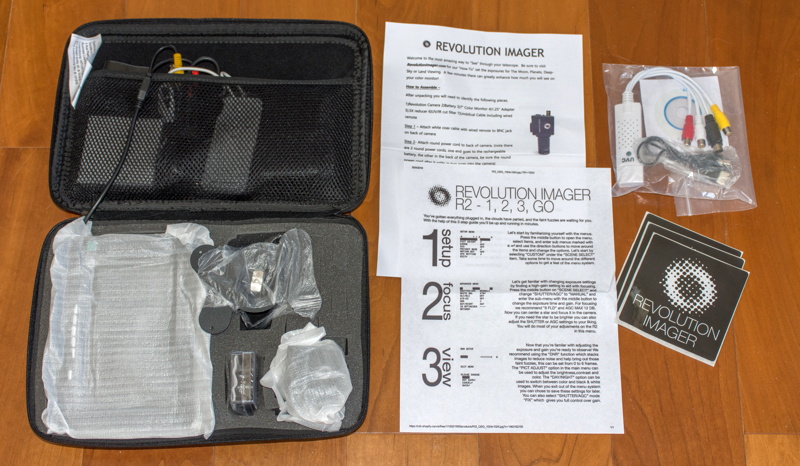
You can read documentation online from Revolution Imager if you want to learn more about the Imager. A 12 page manual is available online.
Setup and Initial Use
After reading the documentation I assembled all the pieces and connected the cables. I used an ETX-70AT for the initial tests indoors during the daytime. The first thing I did was to charge the battery using the supplied AC charger:
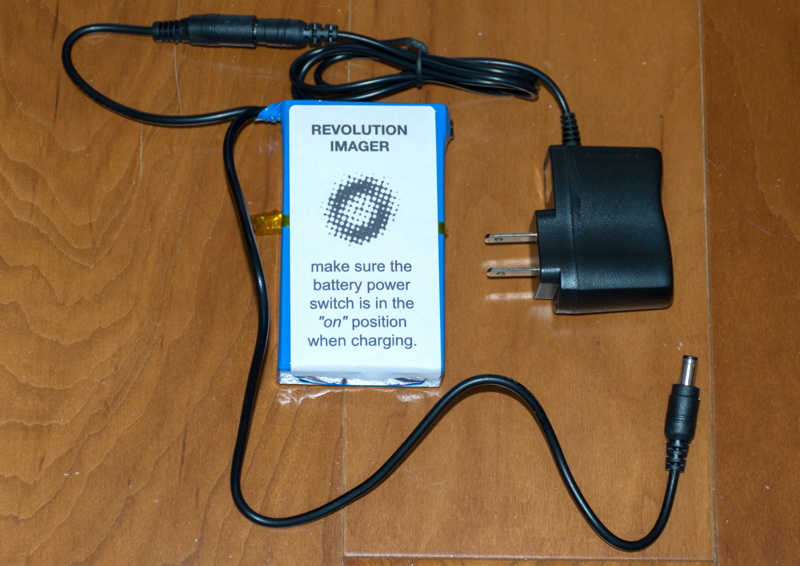
When charging, the adapter has a green LED and the battery shows a red LED. I let the battery charge overnight. The company says it should only take 8 hours for a full charge and the red LED should turn green on full charge, but mine was still red after charging overnight. Note: the AC adapter is ONLY for charging the battery and can not be used to power the Revolution Imager at the telescope. The Revolution Imager uses the same power plug size as the Celestron telescopes, so if you have a Celestron power adapter either AC or DC, that will run the Revolution Imager also. It is a fairly standard 2.1mm ID and 5.5mm OD center pin positive connector. While the battery was charging I connected the various cables to the appropriate components:

There is no cap provided for the 1.25" adapter. I had an extra eyepiece rubber cap to use to keep dust off the sensor when the RI is not in use. Otherwise you should remove the adapter from the camera and use the screw-on cap that comes with the camera.
The instruction sheet for connecting cables mentioned a "multi-prong cable that must line up with the receiving end of the cable that comes from the 7" Color Monitor", but the cable to the monitor was already connected on my unit and was an "RCA-jack" connector. Also, the stand would not attach to the monitor as there was no attachment hole on the bottom as shown in the assembly video on the RI web site:
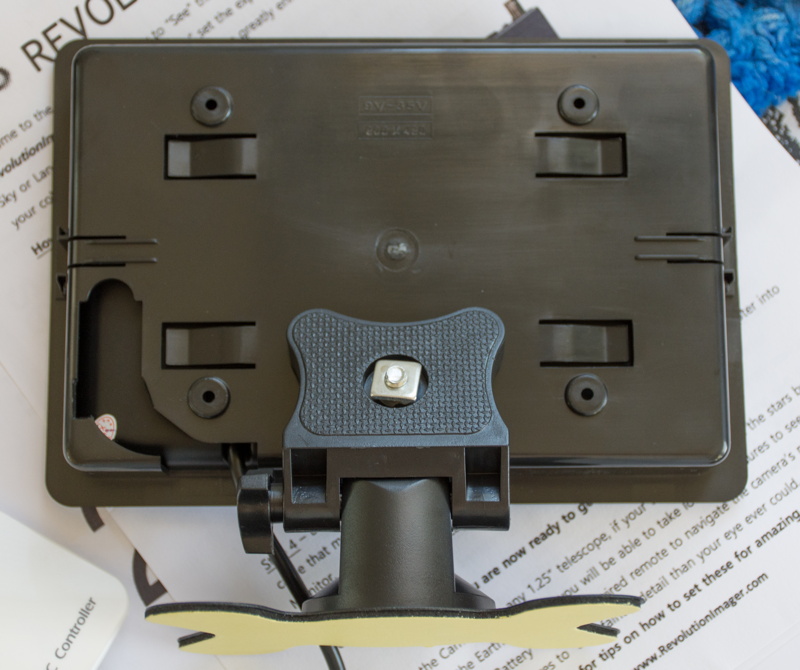
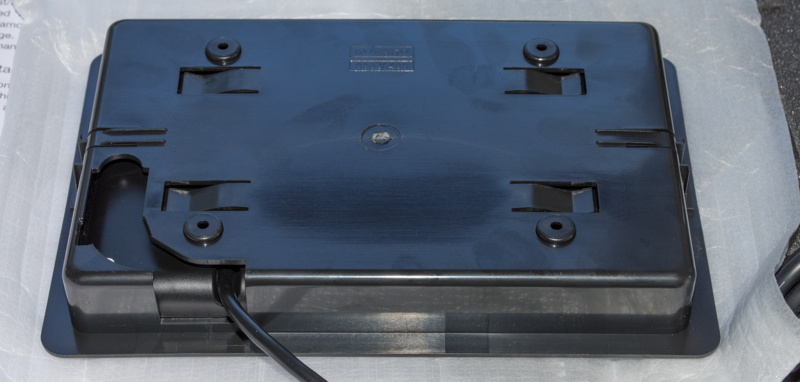
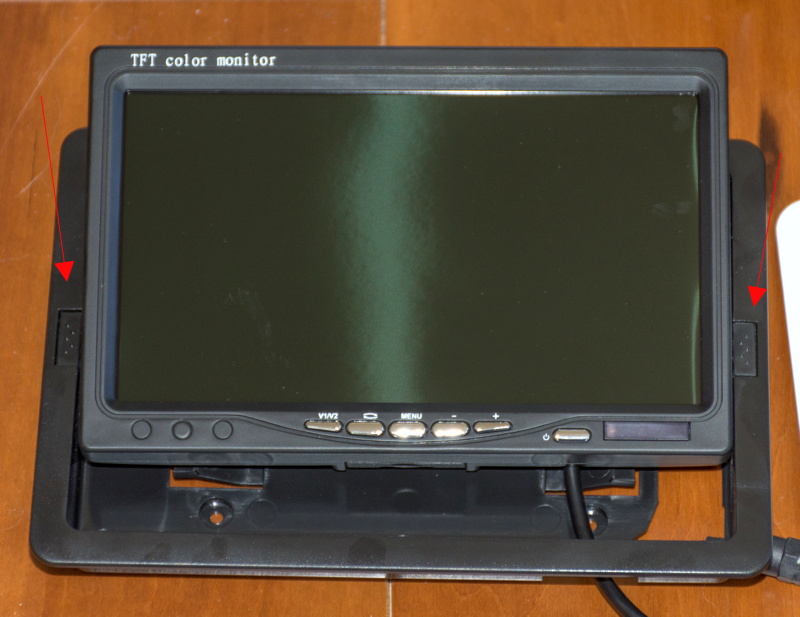
I contacted the company and learned that the outer shell comes off the monitor by pressing in the two tabs on the sides (arrowed in the photo below). Once the outer shell is removed the stand can be attached.

With the battery charged, I inserted the camera into the ETX-70AT eyepiece holder. I then realized one shortcoming; the power cables are really short. As seen in this photo, the battery is hanging from the telescope and the monitor had to be placed very close to the telescope:
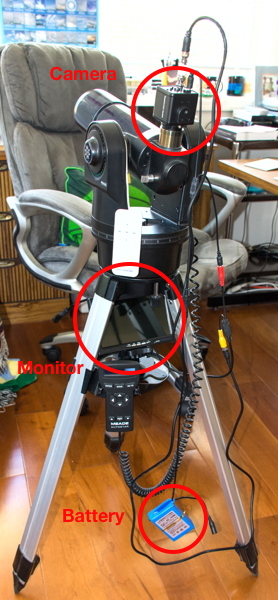
By comparison, the video cable from the camera to the monitor is much longer, but the separation between the telescope and monitor is constrained by the short power cable to the monitor. The battery should really not be hanging as shown in the photo to prevent its weight from causing a power disconnect. I measured the length of the cables as follows (approximate):
Battery to camera: 33"
Battery to monitor: 34"
Video camera to monitor: 98"
Video camera to remote: 38"
The short power cables really limit how far from the camera the monitor can be placed. This can be a problem when the RI is used with a large telescope or even a small telescope where there is no place to set the monitor. (I will point out one solution for the monitor placement on page 3 of this review.)
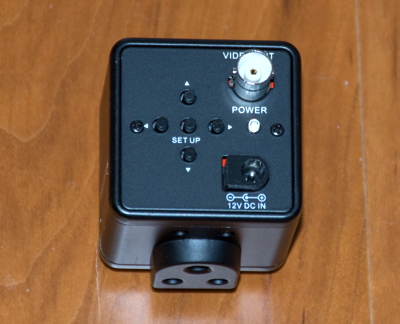
The monitor defaulted to "AV2", which was the correct setting according to the RI documentation. However, the display showed a blue screen with "no signal". I switched the monitor to "AV1", which got a grey screen. I pressed the Setup button on the camera and the camera settings menu appeared on the monitor. So, if you get no signal, switch the video input source.
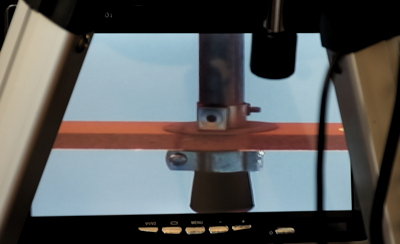
With the camera on and the exposure settings set for Day and Manual (shutter speed 1/10,000 sec) I got an image (left below) from the telescope of an object outside of the house:
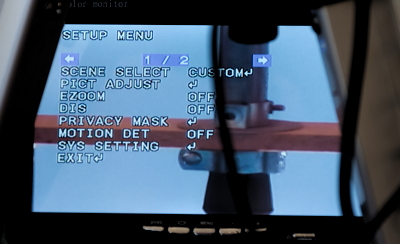
While viewing an object you can adjust the camera settings from its menu (right above). The text is white with a transparent background. So when used at the telescope at night, the mostly dark image on the monitor from the black sky will not significantly harm your night vision. From the camera menu you can adjust the shutter speed range of 1/10,000sec (not 1/100,000sec as stated in the documentation) to 5.12 seconds. You can also adjust gain, color, brightness, contrast, sharpness, and hue. The camera can stack up to six frames automatically to improve the view of faint objects. There is an electronic zoom available from the menu. And you can set to Color or Black-n-White images.
With my indoor tests successful and having learned a little bit about using the Revolution Imager, it was time to use it at night on a telescope. I could pack everything needed except the assembled monitor stand into the carry case to take the Revolution Imager to the observatory.
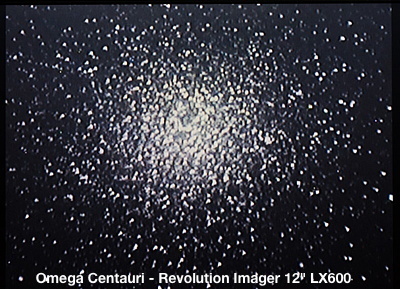
Go to Revolution Imager with 12" LX600 Telescope.
Comments are welcome using Email. If you are on Twitter you can use the button below to tweet this review to your followers. Thanks.
Cassiopeia Observatory Home Page
Copyright ©2016 Michael L. Weasner / mweasner@me.com
URL = http://www.weasner.com/co/Reviews/2016/Revolution_Imager/index.html